Easy DbContext Integration Test with Effort

If you are mocking your DbContext to realize yours integration tests, certainly you are spend your time. I always thought that mock context is a hard job and conducive to bug. Another day after watch the video tutorial about Integration Test I went search some library or framework that help me do it about Entity Framework DbContext. In my search I found (many asks/comments in StackOverflow :P) Effort. Effort is a “In Memory Database“, simple, easy to configure, very useful and c# based!

Installation

You can download de last version here. Or; You can install using Nuget Package Manager. Entity Framework 5: Install-Package Effort -Pre Entity Framework 6: Install-Package Effort.EF6 -Pre

Usage

The SampleContext’s constructor is needed because we pass an fake instance of DbConnection created by Effort library. To factory Effort DbConnection instance we can use:

  1. Effort.DbConnectionFactory.CreateTransient(); – The “CreateTransient” method always returns new instance of DbConnection, in other words, always we call this method we lost previous operations inside the context.
  2. Effort.DbConnectionFactory.CreatePersistent(“whatever”); – The “CreatePersistent” method can be used when you want something like a session. The data will persist in memory.
// Your POCO:

public class Person
{
    public int Id { get; set; }

    public string Name { get; set; }

    private Person() { }

    public Person(string name)
    {
        Name = name;
    }
}

// Your DbContext

public class SampleContext : DbContext
{
    public SampleContext(DbConnection dbConnection) : base(dbConnection, true)
    {   
    }

    public DbSet<Person> People { get; set; }
}

// My Program

class Program
{
    static void Main(string[] args)
    {
        var sampleContext = new SampleContext(Effort.DbConnectionFactory.CreateTransient());

        sampleContext.People.Add(new Person("Jaspion"));
        sampleContext.People.Add(new Person("Jiraya"));

        sampleContext.SaveChanges();
    }
}

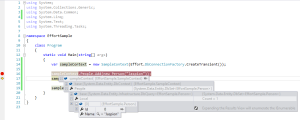
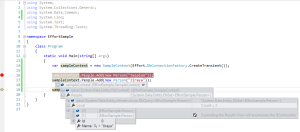
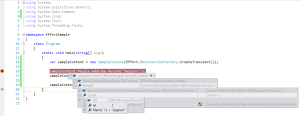
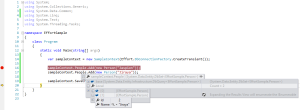
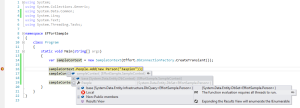
See in the act:

Step 1

Step 2

Step 3

Step 4

Step 5

The next examples is the almost same that exists in the Effort’s blog, but was typed by me. 🙂 I liked this example.

//
// Using the Transient.
//
class Program
{
    static void Main(string[] args)
    {
        var sampleContext = new SampleContext(Effort.DbConnectionFactory.CreateTransient());
        sampleContext.People.Add(new Person("Jaspion"));
        sampleContext.People.Add(new Person("Jiraya"));
        sampleContext.SaveChanges();

        // Output 1
        Console.WriteLine("Transient output 1 - Total People: {0}", sampleContext.People.Count());

        sampleContext = new SampleContext(Effort.DbConnectionFactory.CreateTransient());
        sampleContext.People.Add(new Person("Jaspion"));
        sampleContext.People.Add(new Person("Jiraya"));
        sampleContext.SaveChanges();

        // Output 2
        Console.WriteLine("Transient output 2 - Total People: {0}", sampleContext.People.Count());

        Console.ReadKey();
    }
}

Output 1: “Transient output 1 – Total People: 2”

Output 2: “Transient output 2 – Total People: 2”
Add/Remove Layout Dynamically on Android

This is my first post about Java & Android.

I am .NET developer and I confess that I never thought to write or talk about Java (unless bad words about it), but recently I have studied much about orientation object. Since, in my opinion the  OOP in Java Community is more solid.

Because of this I broke some paradigms and today I respect  this community.

I want make clear that my intention is not explain line by line.

Scenario: I needed add and remove dynamically components inside the Layout when I click on the button.

In my case I want just one EditText field and one button to remove a respective item added inside the Layout.

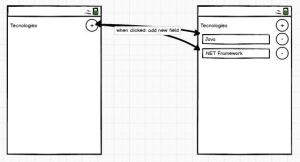
Here is the prototype representing my idea.

(Another example: Android Contacts Manager – add email, phone uses this concept.)

 prototype1
Figure 1 – Prototype

Enviroment: Eclipse JUNO (ADT)
Language: Java
Android minimum version: 2.3.3
Project name: Teste1
Project namesapce: com.example.teste1

 project_structure
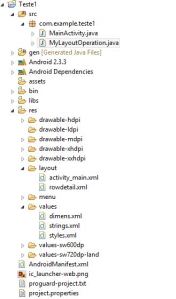
Figure 2 – Project Structure
I solved this problem with this code:

File: res/layout/activity_main.xml

<LinearLayout xmlns:android="http://schemas.android.com/apk/res/android"
xmlns:tools="http://schemas.android.com/tools"
android:id="@+id/layoutTeste"
android:layout_width="fill_parent"
android:layout_height="fill_parent"
android:orientation="vertical"

tools:context=".MainActivity">
<RelativeLayout
android:layout_width="match_parent"
android:layout_height="wrap_content">
<TextView android:id="@+id/textView1"
android:layout_width="95dp"
android:layout_height="fill_parent"
android:layout_alignBottom="@+id/btnAdd"
android:layout_alignParentLeft="true"
android:layout_toLeftOf="@+id/btnAdd"
android:gravity="center_vertical|center_horizontal"
android:text="@string/titleTecnologies"
android:textAppearance="?android:attr/textAppearanceLarge" />

<ImageButton android:id="@+id/btnAdd"
android:layout_width="wrap_content"
android:layout_height="wrap_content"
android:layout_alignParentRight="true"
android:layout_alignParentTop="true"
android:contentDescription="@string/btnAdd"
android:src="@android:drawable/ic_input_add" />
</RelativeLayout>
<ScrollView android:id="@+id/scrollView1"
android:layout_width="match_parent"
android:layout_height="275dp">
<LinearLayout android:id="@+id/linearLayoutForm"
android:layout_width="match_parent"
android:layout_height="wrap_content"
android:orientation="vertical">
</LinearLayout>
</ScrollView>
<Button android:id="@+id/btnDisplay"
android:layout_width="wrap_content"
android:layout_height="wrap_content"
android:text="@string/btnDisplay" />
</LinearLayout>

File: res/layout/rowdetail.xml

<?xml version="1.0" encoding="utf-8"?>
<LinearLayout xmlns:android="http://schemas.android.com/apk/res/android"
android:id="@+id/rowdetail"
android:layout_width="match_parent"
android:layout_height="match_parent"
android:orientation="horizontal">
<EditText android:id="@+id/editDescricao"
android:layout_width="0dp"
android:layout_height="wrap_content"
android:layout_weight="0.62"
android:ems="10"
android:inputType="text"> <requestFocus />
</EditText>
<ImageButton android:id="@+id/btnRemove"
android:layout_width="wrap_content"
android:layout_height="wrap_content"
android:contentDescription="@string/btnRemove"
android:src="@android:drawable/ic_delete" />
</LinearLayout>

File: src/com.example.teste1/MainActivity.java

package com.example.teste1;

import android.os.Bundle;
import android.app.Activity;
import android.view.Menu;
import android.widget.Button;
import android.widget.ImageButton;

public class MainActivity extends Activity {
Button btnDisplay;
ImageButton btnAdd;

@Override
protected void onCreate(Bundle savedInstanceState) {
super.onCreate(savedInstanceState);
setContentView(R.layout.activity_main);
btnAdd = (ImageButton) findViewById(R.id.btnAdd);
btnDisplay = (Button) findViewById(R.id.btnDisplay);

MyLayoutOperation.add(this, btnAdd);
MyLayoutOperation.display(this, btnDisplay);
}

@Override
public boolean onCreateOptionsMenu(Menu menu) {

// Inflate the menu; this adds items to the action bar if it is present.
getMenuInflater().inflate(R.menu.main, menu);
return true;
}
}

File: src/com.example.teste1/MyLayoutOperation.java

package com.example.teste1;

import java.util.ArrayList;
import android.app.Activity;
import android.view.View;
import android.view.ViewGroup;
import android.view.View.OnClickListener;
import android.view.ViewGroup.LayoutParams;
import android.widget.Button;
import android.widget.EditText;
import android.widget.ImageButton;
import android.widget.LinearLayout;
import android.widget.Toast;

public class MyLayoutOperation {

public static void display(final Activity activity, Button btn)
{
btn.setOnClickListener(new OnClickListener() {

@Override
public void onClick(View v) {
LinearLayout scrollViewlinerLayout = (LinearLayout) activity.findViewById(R.id.linearLayoutForm);
java.util.ArrayList<String> msg = new ArrayList<String>();
for (int i = 0; i < scrollViewlinerLayout.getChildCount(); i++)
{
LinearLayout innerLayout = (LinearLayout) scrollViewlinerLayout.getChildAt(i);
EditText edit = (EditText) innerLayout.findViewById(R.id.editDescricao);
msg.add(edit.getText().toString());
}
Toast t = Toast.makeText(activity.getApplicationContext(), msg.toString(), Toast.LENGTH_SHORT);
t.show();
}
});
}

public static void add(final Activity activity, ImageButton btn)
{
final LinearLayout linearLayoutForm = (LinearLayout) activity.findViewById(R.id.linearLayoutForm);
btn.setOnClickListener(new View.OnClickListener() {

@Override
public void onClick(View v) {
final LinearLayout newView = (LinearLayout)activity.getLayoutInflater().inflate(R.layout.rowdetail, null);
newView.setLayoutParams(new LayoutParams(ViewGroup.LayoutParams.WRAP_CONTENT, ViewGroup.LayoutParams.WRAP_CONTENT));
ImageButton btnRemove = (ImageButton) newView.findViewById(R.id.btnRemove);
btnRemove.setOnClickListener(new View.OnClickListener() {

@Override
public void onClick(View v) {
linearLayoutForm.removeView(newView);
}
});
linearLayoutForm.addView(newView);
}
});
}
}

File: res/values/strings.xml

<?xml version="1.0" encoding="utf-8"?>
<resources>
<string name="app_name">Teste1</string>
<string name="action_settings">Settings</string>
<string name="titleTecnologies">Tecnologies</string>
<string name="btnRemove">Remove</string>
<string name="btnAdd">Add</string>
<string name="btnDisplay">Show</string>
</resources>

P.S.: The MyLayoutOperation.java has been created only to separate the code. Nothing special.

Download Sample

First post!

I have another wordpress blog, but my last post was in 2007 and currently your content don’t provides nothing of more.

Then here we go and to try again! 😛